---
title: Spring Bootで最速Servlet開発環境構築 springboot
tags: ["Java", "Servlet", "Spring", "Spring Boot"]
categories: ["Programming", "Java", "org", "springframework", "boot"]
date: 2014-09-13T21:56:49Z
updated: 2014-09-13T21:56:49Z
---
最速かどうかはわからないがw
Spring Bootを使って、Servlet開発環境を作りたいときの設定例。Spring Bootは別にSpring MVC使わなくても良い。
pom.xmlの例
4.0.0
com.example
servlet-sample
0.0.1-SNAPSHOT
jar
org.springframework.boot
spring-boot-starter-parent
1.1.6.RELEASE
org.springframework.boot
spring-boot-starter
org.springframework
spring-web
org.springframework.boot
spring-boot-starter-jetty
org.springframework.boot
spring-boot-starter-test
test
UTF-8
com.example.Application
1.8
org.springframework.boot
spring-boot-maven-plugin
org.springframework
springloaded
1.2.0.RELEASE
適当なServletを作って
package com.example;
import javax.servlet.ServletException;
import javax.servlet.http.HttpServlet;
import javax.servlet.http.HttpServletRequest;
import javax.servlet.http.HttpServletResponse;
import java.io.IOException;
import java.io.PrintWriter;
public class FooServlet extends HttpServlet {
@Override
protected void doGet(HttpServletRequest req, HttpServletResponse resp) throws ServletException, IOException {
PrintWriter writer = resp.getWriter();
writer.println(“Hello World!”);
writer.flush();
}
}
サーブレットの定義は`@Configuration`がついたクラスに`@Bean`をつけて定義する。`ServletRegistrationBean`を使うとweb.xmlに近い定義ができる。
package com.example;
import org.springframework.boot.SpringApplication;
import org.springframework.boot.autoconfigure.EnableAutoConfiguration;
import org.springframework.boot.context.embedded.ServletRegistrationBean;
import org.springframework.context.annotation.Bean;
import org.springframework.context.annotation.ComponentScan;
import org.springframework.context.annotation.Configuration;
@Configuration
@ComponentScan
@EnableAutoConfiguration
public class Application {
public static void main(String[] args) {
SpringApplication.run(Application.class, args);
}
@Bean
ServletRegistrationBean statsServlet() {
return new ServletRegistrationBean(new FooServlet(), "/foo");
}
}
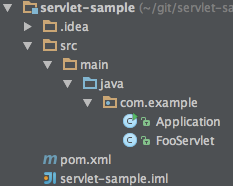
必要なファイルはたったこれだけ。
Servletに`@Component`をつけておけばコンポーネントスキャンされるので、いちいち定義しなくてもよい。今回はServletっぽく、Spring要素をなくしてみた。
あとは`Application`クラスを実行するだけ。または`mvm spring-boot:run`でOK。2秒くらいで起動する。
SpringのDIももちろん使えるのでちょっとした開発(でSpring MVCを使いたくない場合)に良いかも。JerseyとかMojarraも使えるよ。
ちなみに起動時間(MBA 11-inch, Mid 2011)は
* Tomcat + Spring MVCありの場合の起動 `Started Application in 4.629 seconds (JVM running for 5.181)`
* Jetty + Spring MVCありの場合の起動 `Started Application in 3.791 seconds (JVM running for 4.559)`
* Jetty + Spring MVCなしの場合の起動 `Started Application in 2.253 seconds (JVM running for 3.008)`
でSpring MVC抜くと大分はやくなる。。。(^ ^;)
サンプルは
こちら。