PCF DevでローカルCloud Foundry環境を作る
本記事の内容は古いです。PCF Dev v0.16以上をお使いの方はこちらを参照してください。
本記事は「MicroPCFでローカルCloud Foundry環境を作る」のPCF Dev版です。
Cloud FoundryはオープンソースなPaaSプラットフォームであり、ローカルにもPaaS環境を構築することができます。
PCF Devは開発用にローカル環境で簡単にCloud Foundryを試すためのVagrant環境です。Pivotal Cloud Foundryが提供しているサービス(MySQL、Redis、RabbitMQ)も初めから組み込まれていて、vagrant upだけで簡単にローカル開発環境を用意できます。(Pivotal Cloud FoundryやOSSのCloud Foundryとの違いはこちらを参照してください)
試したのはv0.13.0(Open Beta版)です。 また、VagrantとVirtualBoxのバージョンは以下の通りです。
$ vagrant --version
Vagrant 1.8.1
$ VBoxManage --version
5.0.12r104815
セットアップ方法
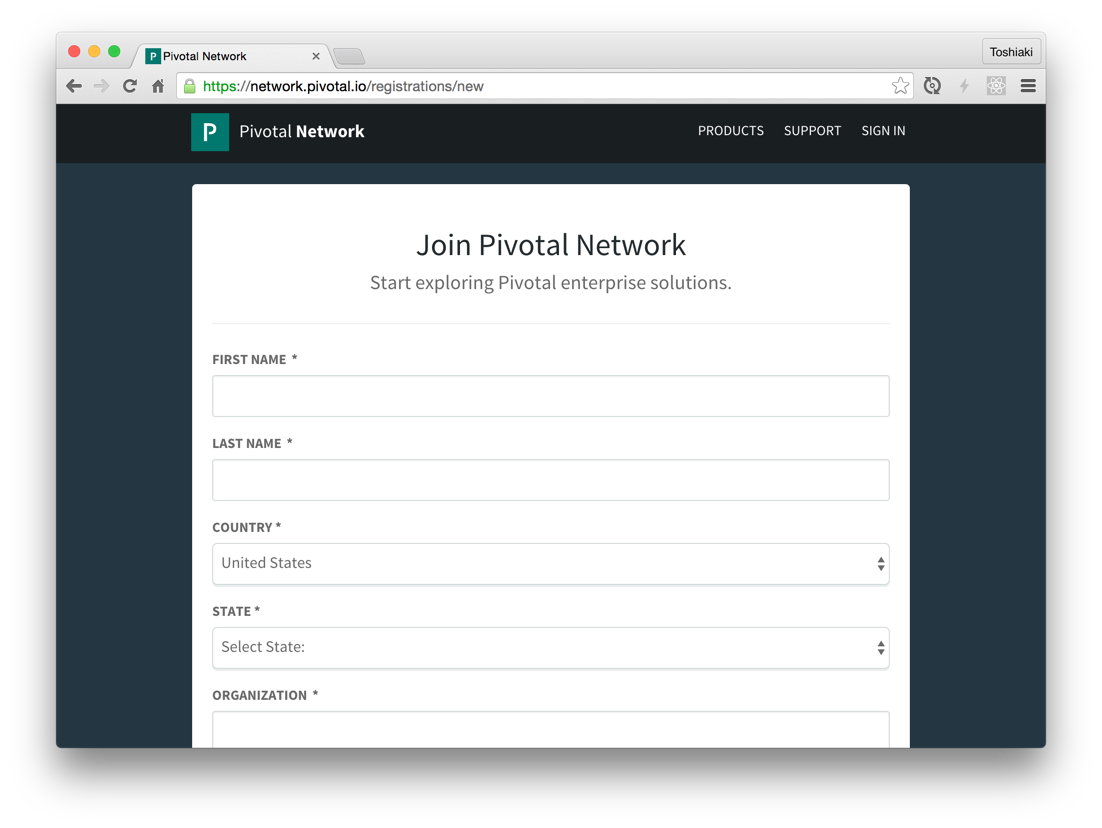
PCF DevはPivotal Networkからダウンロードできます。

ダウンロードするにはPivotal Networkにログインする必要があります。こちらからアカウントを作成してください。
ダウンロードしたpcfdev-v0.13.0.zipを展開してください。
$ unzip pcfdev-v0.13.0.zip
$ cd pcfdev-v0.13.0
$ ls -l
total 64
-rw-r--r--@ 1 makit  720748206  4466  3 30 12:26 Vagrantfile
-rwxr-xr-x@ 1 makit  720748206   129  4  1 00:52 destroy-osx
-rw-r--r--@ 1 makit  720748206   122  4  1 00:52 destroy-windows.ps1
-rwxr-xr-x  1 makit  720748206  2237  4  2 02:00 start-osx
-rw-r--r--@ 1 makit  720748206  2651  4  1 01:26 start-windows.ps1
-rwxr-xr-x@ 1 makit  720748206   123  4  1 00:52 stop-osx
-rw-r--r--@ 1 makit  720748206   116  4  1 00:52 stop-windows.ps1
Vagrantfileと起動、停止、破棄のためのスクリプトがOS X用、Windows用に用意されています。
スクリプトを使って./start-osxで起動できますが、ここではスクリプトを使わない方法を紹介します。スクリプトを使う方法はマニュアルを参照してください。
設定可能な環境変数は以下の通りです。
PCFDEV_IP... PCF DevのIPアドレス(デフォルトは192.168.11.11)PCFDEV_DOMAIN... PCF Devのドメイン名(デフォルトのIPアドレスを使う場合はlocal.pcfdev.io、それ以外の場合は$PCFDEV_IP.xip.io)VM_CORES... VMに割り当てるCPU数(デフォルトはホストマシンの論理コア数)VM_MEMORY... VMに割り当てるメモリ(MB)(デフォルトはホストマシンの1/4のメモリ)
192.168.11.*をすでに使っている場合は、PCFDEV_IPを設定しないと、
The specified host network collides with a non-hostonly network!
This will cause your specified IP to be inaccessible. Please change
the IP or name of your host only network so that it no longer matches that of
a bridged or non-hostonly network.
と言われます。この場合は、以下の環境変数を設定してください。
$ export PCFDEV_IP=192.168.33.10
この設定を行った場合は、この後のlocal.pcfdev.ioを$PCFDEV_IP.xip.ioに読み替えてください。
以上の設定の後、vagrant upします。boxのファイルサイズがかなり大きいので初回ダウンロードは30分ほど時間がかかります(2回目以降も起動に10分ほどかかります・・・)。
$ vagrant up --provider virtualbox
Bringing machine 'default' up with 'virtualbox' provider...
==> default: Importing base box 'pcfdev/pcfdev'...
==> default: Matching MAC address for NAT networking...
==> default: Checking if box 'pcfdev/pcfdev' is up to date...
==> default: Setting the name of the VM: pcfdev-v0130_default_1459809996734_18657
==> default: Clearing any previously set network interfaces...
==> default: Preparing network interfaces based on configuration...
    default: Adapter 1: nat
    default: Adapter 2: hostonly
==> default: Forwarding ports...
    default: 22 (guest) => 2222 (host) (adapter 1)
==> default: Running 'pre-boot' VM customizations...
==> default: Booting VM...
==> default: Waiting for machine to boot. This may take a few minutes...
    default: SSH address: 127.0.0.1:2222
    default: SSH username: vagrant
    default: SSH auth method: private key
    default:
    default: Vagrant insecure key detected. Vagrant will automatically replace
    default: this with a newly generated keypair for better security.
    default:
    default: Inserting generated public key within guest...
    default: Removing insecure key from the guest if it's present...
    default: Key inserted! Disconnecting and reconnecting using new SSH key...
==> default: Machine booted and ready!
==> default: Checking for guest additions in VM...
==> default: Configuring and enabling network interfaces...
==> default: Running provisioner: shell...
    default: Running: inline script
==> default: stdin: is not a tty
==> default: Waiting for services to start...
==> default: 0 out of 48 running
==> default: 0 out of 48 running
==> default: 0 out of 48 running
==> default: 0 out of 48 running
==> default: 0 out of 48 running
==> default: 4 out of 48 running
==> default: 28 out of 48 running
==> default: 45 out of 48 running
==> default: 45 out of 48 running
==> default: 46 out of 48 running
==> default: 46 out of 48 running
==> default: 48 out of 48 running
==> default: PCF Dev is now running.
==> default: To begin using PCF Dev, please run:
==> default: 	cf login -a api.local.pcfdev.io --skip-ssl-validation
==> default: Email: admin
==> default: Password: admin
立ち上がりました!
アプリケーションをデプロイ
まずはログインします。ユーザー名、パスワードともにadminです。
$ cf login -a api.local.pcfdev.io -u admin -p admin --skip-ssl-validation
API endpoint: api.local.pcfdev.io
Authenticating...
OK

Targeted org pcfdev-org

Targeted space pcfdev-space


API endpoint:   https://api.local.pcfdev.io (API version: 2.51.0)
User:           admin
Org:            pcfdev-org
Space:          pcfdev-space
前に書いた入門記事と同じくhello-pwsをpushします。
$ git clone https://github.com/making/hello-pws
$ cd hello-pws
$ mvn clean package
$ cf push hello-pws -p target/hello-pws.jar -m 256m
Creating app hello-pws in org pcfdev-org / space pcfdev-space as admin...
OK

Creating route hello-pws.local.pcfdev.io...
OK

Binding hello-pws.local.pcfdev.io to hello-pws...
OK

Uploading hello-pws...
Uploading app files from: target/hello-pws.jar
Uploading 485.1K, 89 files
Done uploading
OK

Starting app hello-pws in org pcfdev-org / space pcfdev-space as admin...
Downloading binary_buildpack...
Downloading nodejs_buildpack...
Downloading python_buildpack...
Downloading java_buildpack...
Downloading go_buildpack...
Downloading ruby_buildpack...
Downloading php_buildpack...
Downloading staticfile_buildpack...
Downloaded binary_buildpack (8.3K)
Downloaded staticfile_buildpack (2.4M)
Downloaded nodejs_buildpack (44.3M)
Downloaded java_buildpack (241.6M)
Downloaded ruby_buildpack (258.6M)
Downloaded python_buildpack (254M)
Downloaded php_buildpack (217.1M)
Downloaded go_buildpack (344.8M)
Creating container
Successfully created container
Downloading app package...
Downloaded app package (11.7M)
Staging...
-----> Java Buildpack Version: v3.6 (offline) | https://github.com/cloudfoundry/java-buildpack.git#5194155
-----> Downloading Open Jdk JRE 1.8.0_71 from https://download.run.pivotal.io/openjdk/trusty/x86_64/openjdk-1.8.0_71.tar.gz (found in cache)
       Expanding Open Jdk JRE to .java-buildpack/open_jdk_jre (2.1s)
-----> Downloading Open JDK Like Memory Calculator 2.0.1_RELEASE from https://download.run.pivotal.io/memory-calculator/trusty/x86_64/memory-calculator-2.0.1_RELEASE.tar.gz (found in cache)
       Memory Settings: -Xms160M -Xss853K -Xmx160M -XX:MaxMetaspaceSize=64M -XX:MetaspaceSize=64M
-----> Downloading Spring Auto Reconfiguration 1.10.0_RELEASE from https://download.run.pivotal.io/auto-reconfiguration/auto-reconfiguration-1.10.0_RELEASE.jar (found in cache)
Exit status 0
Staging complete
Uploading droplet, build artifacts cache...
Uploading build artifacts cache...
Uploading droplet...
Uploaded build artifacts cache (108B)
Uploaded droplet (56.7M)
Uploading complete

0 of 1 instances running, 1 starting
1 of 1 instances running

App started


OK

App hello-pws was started using this command `CALCULATED_MEMORY=$($PWD/.java-buildpack/open_jdk_jre/bin/java-buildpack-memory-calculator-2.0.1_RELEASE -memorySizes=metaspace:64m.. -memoryWeights=heap:75,metaspace:10,native:10,stack:5 -memoryInitials=heap:100%,metaspace:100% -totMemory=$MEMORY_LIMIT) && JAVA_OPTS="-Djava.io.tmpdir=$TMPDIR -XX:OnOutOfMemoryError=$PWD/.java-buildpack/open_jdk_jre/bin/killjava.sh $CALCULATED_MEMORY" && SERVER_PORT=$PORT eval exec $PWD/.java-buildpack/open_jdk_jre/bin/java $JAVA_OPTS -cp $PWD/.:$PWD/.java-buildpack/spring_auto_reconfiguration/spring_auto_reconfiguration-1.10.0_RELEASE.jar org.springframework.boot.loader.JarLauncher`

Showing health and status for app hello-pws in org pcfdev-org / space pcfdev-space as admin...
OK

requested state: started
instances: 1/1
usage: 256M x 1 instances
urls: hello-pws.local.pcfdev.io
last uploaded: Mon Apr 4 23:12:14 UTC 2016
stack: cflinuxfs2
buildpack: java-buildpack=v3.6-offline-https://github.com/cloudfoundry/java-buildpack.git#5194155 java-main open-jdk-like-jre=1.8.0_71 open-jdk-like-memory-calculator=2.0.1_RELEASE spring-auto-reconfiguration=1.10.0_RELEASE

     state     since                    cpu    memory           disk           details
#0   running   2016-04-05 08:13:48 AM   0.0%   220.7M of 256M   136.2M of 1G
デプロイできました。
$ curl hello-pws.local.pcfdev.io
Hello from 10.0.2.15:60000
スケールアウトも前記事と同じようにできます。
ローカルでCloud Foundryを色々試したい場合に便利です。
ただし、管理コンソールはありません。
またマーケットプレイスにはv0.13.0の段階で
- MySQL
- Redis
- RabbitMQ
が登録されています。これはPivotal Services Suite for Pivotal Cloud Foundryとほぼ同じもので、PCF Devで動いたアプリがPCFでも動くことを目的としてサービスが用意されているようです。
$ cf marketplace
Getting services from marketplace in org pcfdev-org / space pcfdev-space as admin...
OK

service      plans        description
p-mysql      512mb, 1gb   MySQL databases on demand
p-rabbitmq   standard     RabbitMQ is a robust and scalable high-performance multi-protocol messaging broker.
p-redis      shared-vm    Redis service to provide a key-value store

TIP:  Use 'cf marketplace -s SERVICE' to view descriptions of individual plans of a given service.
こちらのハンズオンの内容もPCF Devで実施できるので、環境構築後に一通り試してみてください。